I then remembered cruising one of the tech forums (dorikaze - IIRC) that said there was distributor rebuild kits available for the 4age distributors. They had previously been marketed towards the AW11 MR-2 crowd, and not the AE86 Corolla guys. Fortunately I was able to search and find the company that carries the rebuild kit - KBOX in Canada http://www.kbox.ca . So I go ahead and order a kit up to repair my fried distributor.
(In the mean time I swapped in an AW11 distributor to keep the car rolling. Which can be seen in one of my other posts, it's a direct swap.)
Anyways, here's what to do.
1. Remove distributor (and cap and rotor). If you need pics for this, you shouldn't be attempting it
2. Drill out the 'roll pin' from the distributor gear to remove gear from the distributor shaft.
This is kind of a tricky PITA, type of deal. Since the OEM pin used is mushroomed into place, you need to carefully remove the mushroomed part of the roll pin with a drill bit that is actually larger than the part of the pin inside the shaft/gear itself. Without eating into the distrubutor gear.
Once that portion is removed you need to drill out the remainder of the OEM roll pin with a small drill bit. NOTE: do NOT go larger than 1/8" drill bit, that is almost TOO large to drill out the center. I'd recommend a 3/32" bit. Then you take a small punch and knock the remainder of the pin out of the gear/shaft. From there it should be relatively easy to slide or pry the distributor gear off the shaft.
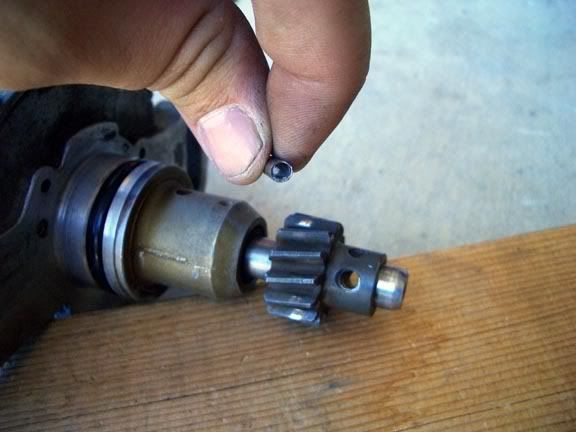
3. Loosen the screws for the distributor shaft/bearing retainers. If your having trouble getting them with a regular screw driver (and you really don't want to strip the heads of these) I'd recommend giving it a light whack with an impact screwdriver. That's what I did.
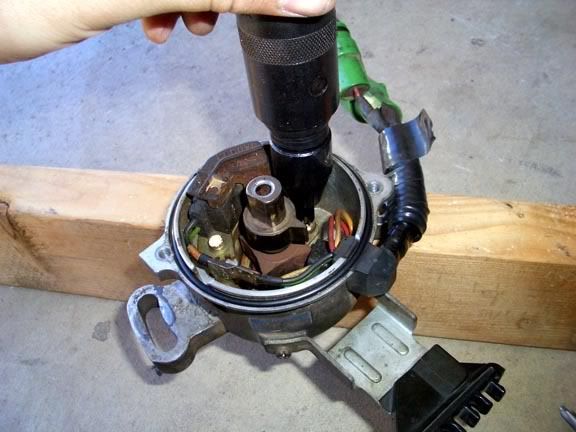
Once loose it's a cinch.
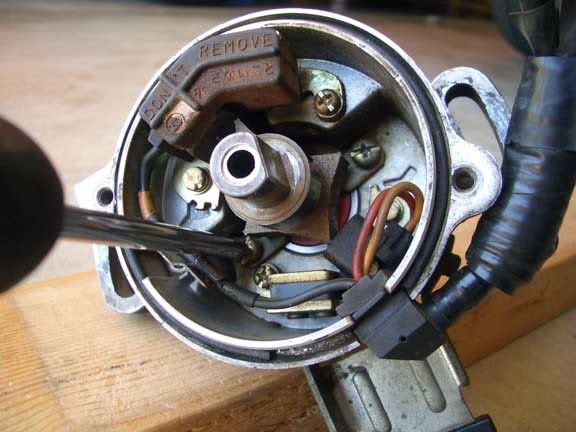
4. Now that the retainers are gone you should be able to slide the distributor shaft/stator assy out of the housing with ease.
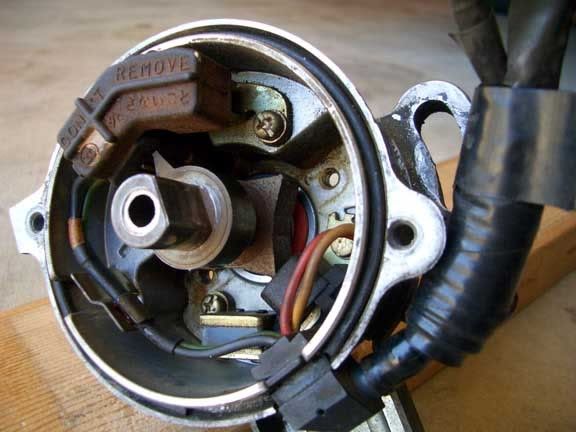
5. Now that it's out, you need to remove the shaft seal from the center of the housing. It should look like this once removed.
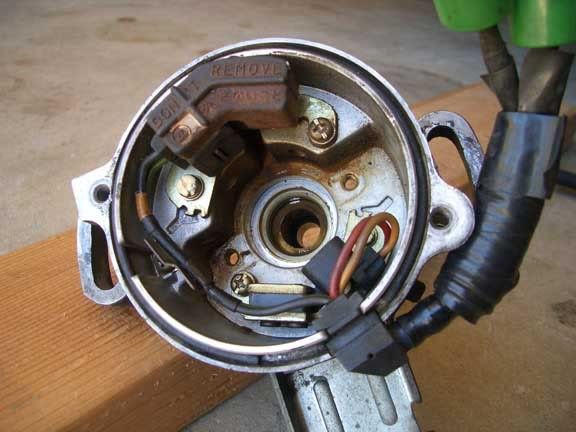
6. At this point your going to need a special tool or two. Either access to a small press, or a pulley and small bearing puller/splitter set.
Set the bearing up for removal, and pull/press/push the bearing off the shaft.
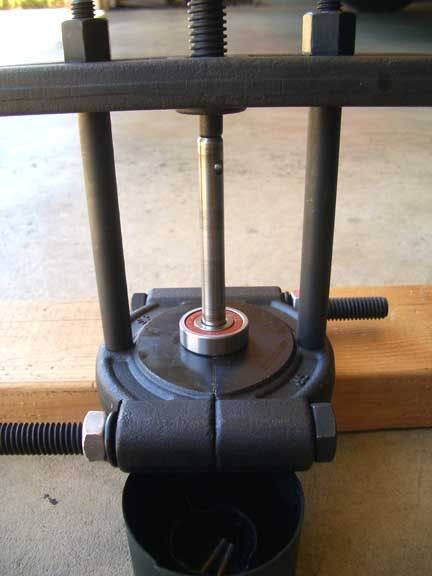
7. Grab your rebuild kit.
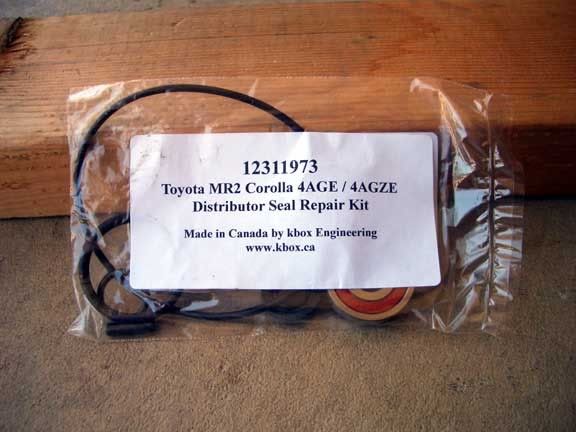
Here's a close up of the contents. Note: the smallest o-ring is NOT used with the AE86 distributor (and possibly the AW11 MR-2 4age one either, I think it's for the 4agze distributor only...)
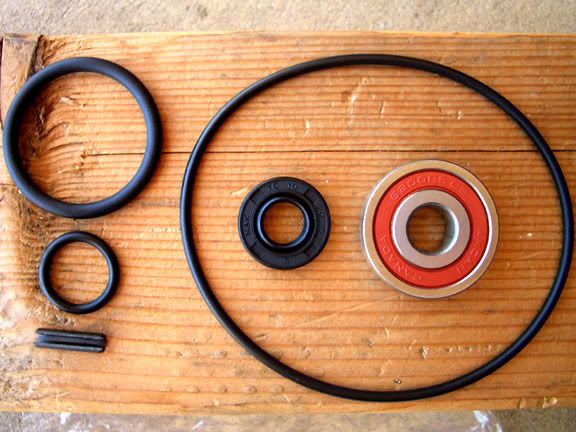
8. Install the new distributor shaft seal. I used a 14mm socket and lightly tapped it into place with a hammer, I set the housing upright on a 2x4 to prevent damage to the housing itself.
The top of the seal should sit level with the bottom of the bevel of the housing opening.
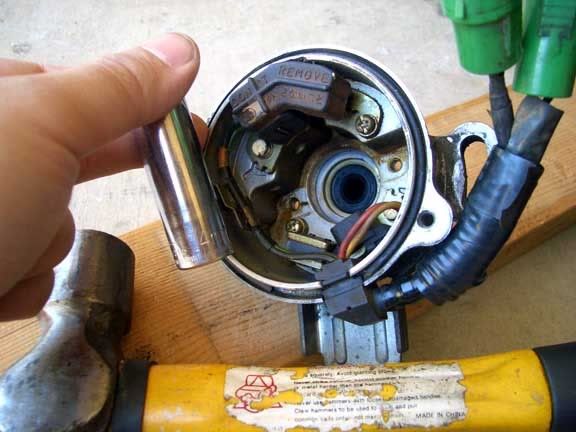
Tip: get a drop or two of ATF and wet the seal down, it really helps when it comes time to install the distributor shaft.
9. Install the new bearing. I found that if you grab a seatbelt bolt from the front seats, it has a 1/2" thick or so spacer that works perfect as an arbor to press directly against the center of the new bearing. Just set that on top of a fender washer and push the bearing up into place.
If your uncertain of how far to press it. You can simply remove the shaft and check to see how much further you need to press it by checking where the stator on the distributor shaft sits in relation to the pickup/hall effect sensor/electronics inside the distributor housing. It should sit centered over the sensor strip.
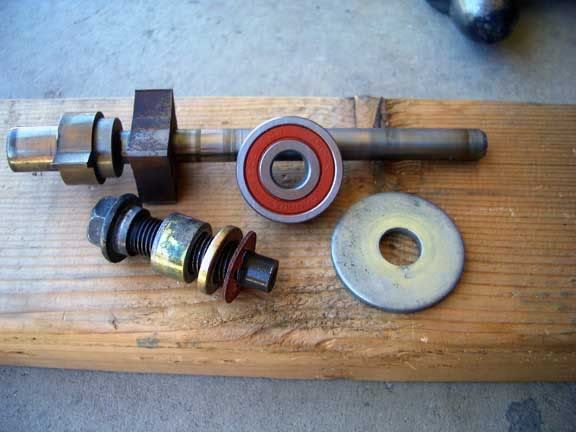
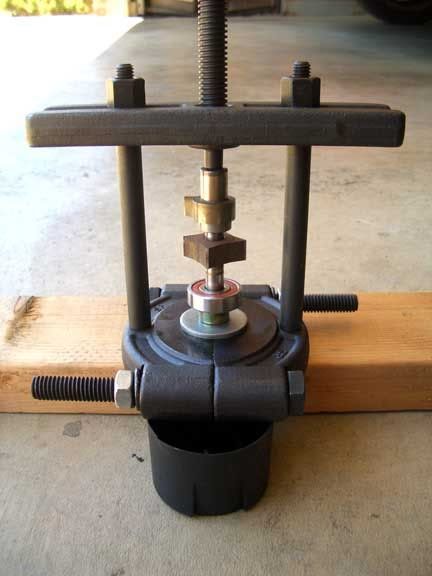
10. Now that the bearing is on the shaft, reinstall it along with the bearing/shaft retainers. I tightened mine back up with a light application of the impact screwdriver.
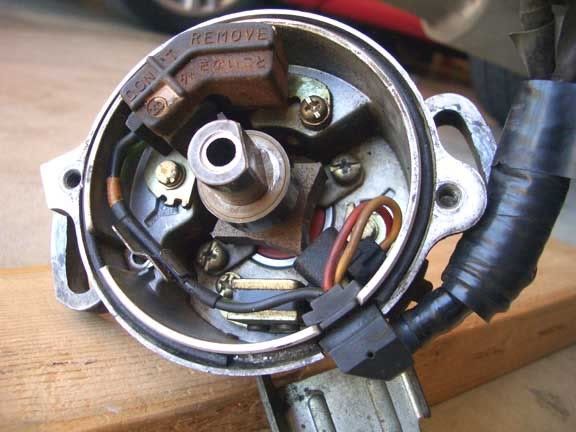
11. Install distributor gear.
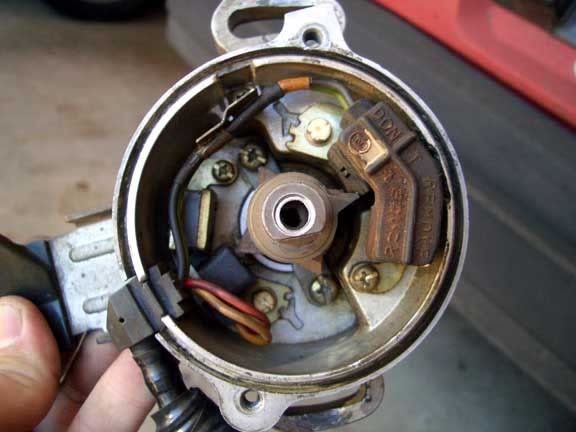
Position the distributor shaft/stator as seen here. The top stator should point just to the right of the sensor. This is the proper position to line up the distributor gear and housing marks correctly.
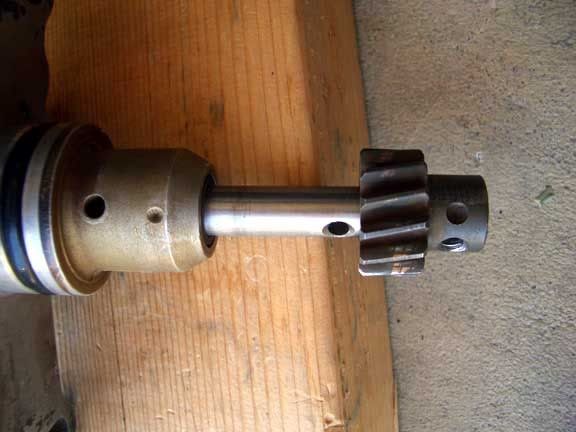
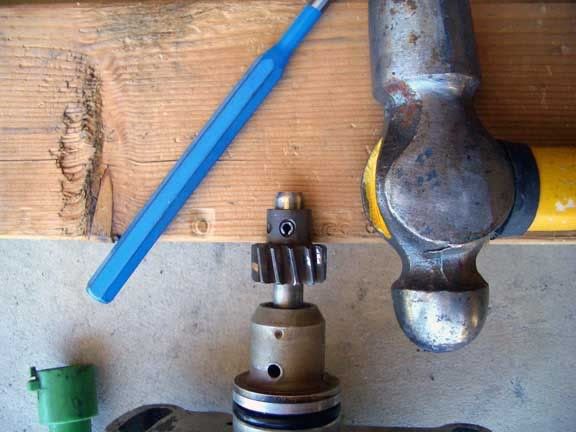
Now that it's lined up, time into install the roll punch. I started it with the hammer, then drove it into place with the punch. It will stick out both sides of the distributor gear, just make it an even amount.
12. Install the new housing to cylinder head sealing o-ring. Cut the old one off, most likely its super hard/brittle from heat. There really isn't much of a point to trying to remove it with a pick.
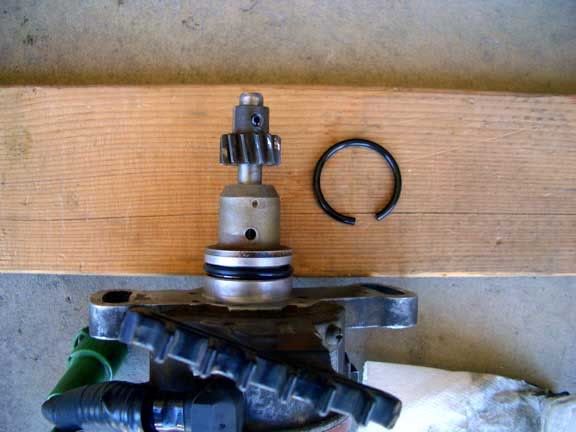
Don't forget to lightly oil the o-ring when your reinstalling the distributor housing to make life easier.
Done.
Andrew
 Sign In
 Create Account


 Back to top


